
In this (not entirely serious) post, I briefly review an accessory I acquired recently that has turned out to be actually pretty useful... and a cheap alternative to what I was looking for. Really, it was pretty cheap. These things cost like $200 and up. How did I get it so cheap? Connections :) ... and it's a custom part that someone threw together.
But seriously, it's ingenious. I saved like $185 dollars.
I've been the owner of a Leica M6 for a while and I use it constantly for almost all of my photography work. It's perfection of a camera. If the Lord created a camera, it would be a Leica M6 with light rays shining from it. It shoots rainbows at all angles when you rewind the film. It puts magical photography dust in your images when you least expect it (and in your scans). It automatically photoshops velociraptors into your wedding photos. PEW PEW! INSTANT MAGICAL PHOTO AWESOMENESS.
NOT.
Actually, in all honesty, using a rangefinder has been a difficult process for me and has required a lot of "re-thinking" on my part in terms of how I photograph. It's a whole different experience from what I've been used to before and, as I mentioned in a previous blog post, it revealed to me how much I needed to improve my photography.
So what did I do? How did I solve this difficulty? What any photographer would do... BUY AN ACCESSORY OF COURSE. THROW MONEY AT THE PROBLEM!!!!! CHUCK MONEY AT IT WITH PASSION!!!
Alright, let's get to it.
Without getting into the details of rangefinders, frame lines and limitations and what not, I will simply say that I was looking for a viewfinder attachment/accessory because of two reasons:
1) The Leica M6 I have does not allow me to see the full 35mm framelines when I have glasses on.
2) The lens I use is relatively large so it blocks the viewfinder so I can't see a bit of the lower right edge of the frame.

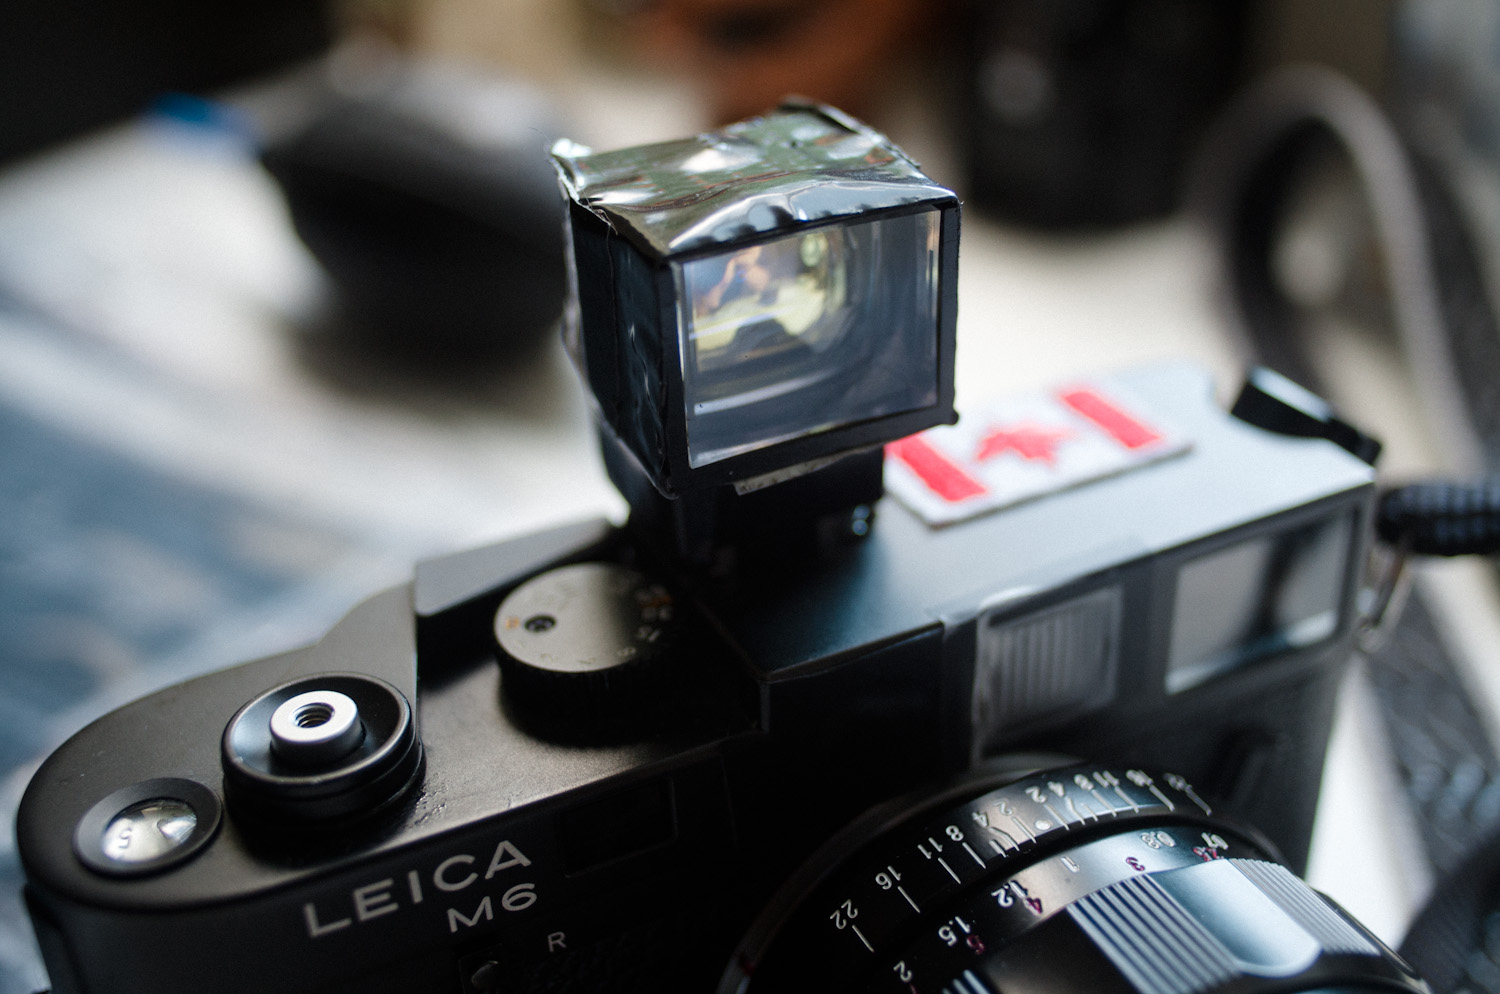
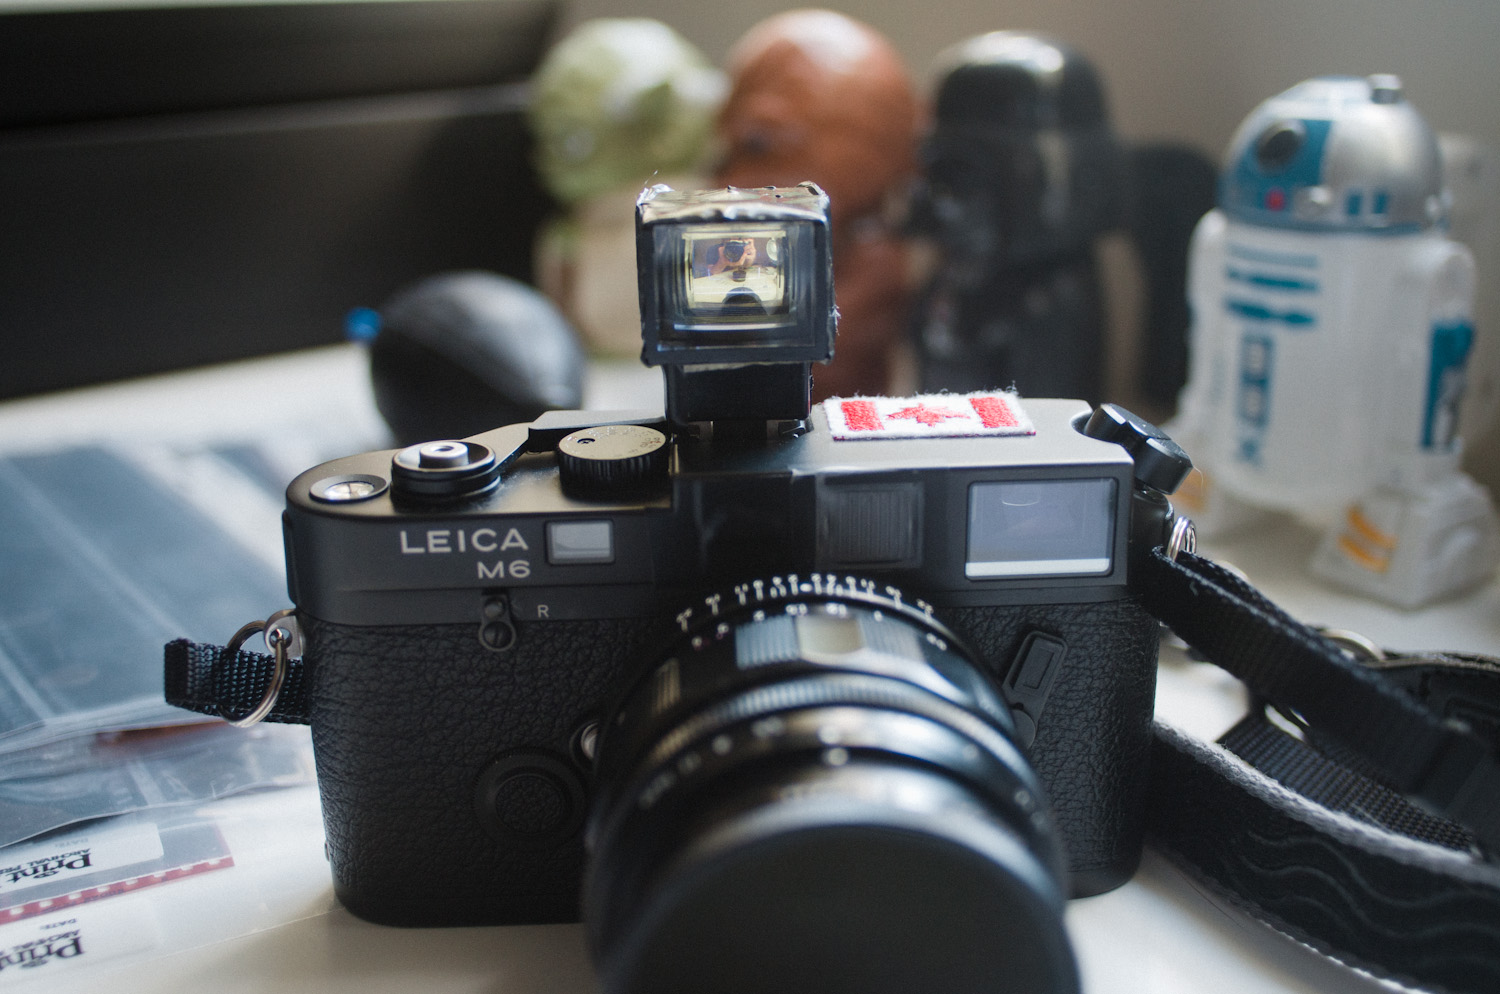
Enter the accessory viewfinder. This is placed on the top of the rangefinder in the accessory shoe (where you put the flash) and gives me framelines from which I can look through and provides an equivalent view of looking through the 35mm lens I have on the camera. So I mentioned that it was cheap. Why? It's... taped together.

This viewfinder is actually made from parts of an old 35mm film point and shoot camera, an accessory shoe and some pretty slick black duct tape (there is always the option of putting stickers on it if you don't like the black... maybe like a scratch and sniff strawberry sticker...or even Hello Kitty?).

After some movement in my bag, I noted that it had already started to fall apart. The tape was starting to shift (not stick) and the glue holding the old viewfinder part to the shoe part was no longer .... attaching. So I did what I would normally do in such a situation: break out the electrical and double sided tape and tape things back down. Mwa ha ha. The battle station is now FULLY OPERATIONAL. Where are your rebel friends... ....


Does it work? Actually... yes, it does. Quite well for that matter. Nowhere near as sturdy as the more expensive Voigtlander and Leica ones but it certainly gets the job done. If I needed one of these and was heading into the jungle or dense bush and trudging through mud and snow and bushes... well, I'm sure the camera would be fine... but I'd be a complete mess!.... and the viewfinder probably would've been lost somewhere between the jungle and the dense bush... in pieces.
The reality is that I don't really need it and I just need to continue to practice with the viewfinder and the framelines built into the Leica M6 and work around the little nuances. Just because I place a viewfinder on top of the camera does not mean it's going to magically make my photos better. I have to learn and practice and work at it. (It's kind of like that unicorn attachment for cats... Totally don't "need" it and your cat is still awesome).
That all being said, at this point, I'm keeping it on my camera. While I can definitely live without it and just work around my technical hurdles, having this viewfinder is actually a nice option. There are times where I just want to look at a scene without focus patches, huge lens distractions and also to see the scene in the context of my lens.

The Last Word: this is a cheaply built viewfinder and won't take a lot of punishment (bring tape with you, or just buy the real thing. There's lots of options). That being said, it serves the purpose for which I got it: to provide a clean view with frame lines to aid in estimating what the photo may look like before actually committing to it... and it cost me very little.
Rating out of 5? How about a 250,891,023,789,172,897,389 for those days when you feel awesome, a -14,123,182,038,910 for days when photo-taking is kind of a downer, and a 53.56 if you had Subway today. I told you this wasn't a serious post ;)

This viewfinder is Hikari-The-Cat-approved.
SUMMARY (PROS):
- Cheap
- Provides a clear (albeit yelllow) view. It's like the 60s all over again... with framelines.
- It's black so it blends in with the night... like Batman.
- Very light. I have another accessory viewfinder that's a lot heavier... probably because it's made of 1950s meteorite or something.
SUMMARY (CONS):
- Not expensive.
- Plastic and tape plus a metal attachment... it's not super durable.
- Does not cause your Leica M6 to shoot rainbows every time you press the shutter.
- Does not superimpose velociraptors into your street photographs... without the special Jurassic attachment.